Something to be passionate about

Today’s BEDM prompt is ‘passion projects’ – something you do for fun, which you’d like to make some cash out of.

Conveniently, I do actually have one of these, of sorts- a fair few years ago, well, about five, my sister was getting married. And wedding cakes were coming out pricey, particularly as she wanted one of those (as they were then) new fangled cupcake towers. So I stepped up to the plate and in spite of never having baked anything more complicated than a wonky chocolate sponge, said I’d make her wedding cakes.

It was a rip roaring success and I enjoyed myself so much that I decided to put myself out there on a little corner of the web, called the Little Gem Bakery. And to my great stonking surprise, as well as taking orders from people I knew, I was getting emails from total strangers- it really was very odd!

My collection of cake making equipment grew to epic proportions and I started taking on a silly amount of work- there was one weekend when I made three wedding cakes and a birthday order, from my tiny weeny kitchen and something had to give, so I asked my fantabulous husband to help out- Mark comes from the loins of an expert cake decorator and is super artsy, so he was well placed to help make decorations, models and various fiddly bits, as well as occasionally being in charge of weilding the cake mixer.

About eighteen months ago, we were moving house, things were getting a bit busy with my actual work work and i just sort of wanted my evenings and weekends back, so I made the decision to slow things down. The website’s still up, but in an epic bit of crap buisnesswomanry, I’ve been turning down more orders than I’ve taken on this year. If I’m entirely honest, i think i might just allow it to grind to a halt over the next year- I am super grateful that I enjoy my ‘proper’ job so much that I’ve not needed to take the plunge with my passion project and go it full time, and have been able to make sure that cake baking carries on being enjoyable!

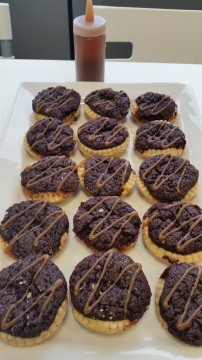
Chocolate brownie tarts

It’s been a while since anything more exciting than a vanilla sponge has been baked in the Gem and Mark household, but with Mark’s company instigating another bake-off, the Mr decided to take to the kitchen. I kinda watched, and came in to stir stuff and make a nuisance of myself when I was bored of doing the ironing.

A triple complicated combo was decided upon- A shortcrust pastry tart, topped with salt caramel, topped with chocolate brownie. Sort of like a chocolatey bakewell tart…ish.

We could have made shortcrust pastry, because it is easy, but even easier than that is buying it in a block in tescos, so that’s what we did.

20140428_093520

Phase 1- Tarts. Roll out the shortcrust pastry, cut out rounds and insert into a pre-greased cupcake tin. One block made about 24 tarts.

Prick the bottoms of the tarts, top with little tin foil parcels of lentils or rice or whatever you have knocking around and stick in the oven- gas mark 6- for about 15 minutes or until they’re pale and crisp

Phase 2- Caramel. We didn’t cheat on this- could have just bought a tin of carnation, but there was a pot of double cream in the fridge that needed using, so:

(adapted from the Comfort of Cooking … and in cups because, well I have measuring cups and couldn’t be bothered to translate into proper measurements for the purposes of tidiness. If you don’t have cups, you should probably buy some)

Ingredients
1 cup of caster sugar
1/4 cup of water
3/4 cup double cream
3 tablespoons unsalted butter
3/4 teaspoon salt (we used the 1 teaspoon from the original recipe, but it was a wee bit much so would reduce next time

How to do it…
1- Stir together water and caster sugar in a saucepan on a low heat. When the sugar dissolves, turn up the heat, bring to the boil and leave it. DON’T STIR!
2- Watch carefully. When it turns a deep amber colour (mine went amber at the edges first, so be careful not to let it burn!), remove from the heat, add the cream and stir stir stir. It will bubble like an absolute beast!
3- Add the butter and salt and you’re done. What’s not used with the brownies can be stored in the fridge for up to two weeks.

Phase 3- Brownies. My ultimate go-to brownie recipe is from a Jamie Oliver cook book. I don’t need another brownie recipe. Bold words!

Ingredients
125g butter
100g dark chocolate (70% cocoa solids)
40g cocoa powder
33g plain flour
1/2 tsp baking powder
180g caster sugar
2 large eggs, beaten

How to do it…
1-Melt the butter and chocolate in the microwave- check it often and stir, to stop it burning
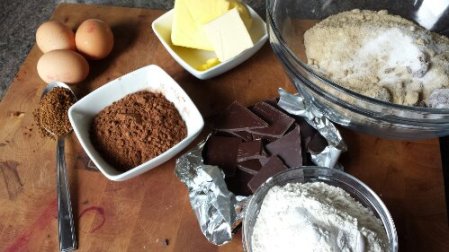
2- combine the cocoa powder, flour, baking powder and sugar in a bowl the add the chocolatey butter mix. Stir together to combine
3- Pour in your eggs and mix well again

Phase 4- Assemble!
-Add a teaspoon of caramel to the bottom of each tart tin (take out your blind baking parcels first!)
-Top with a tablespoon of brownie mix (try to cover the whole of the caramel surface or it tries to bubble out of the sides. There will be a little bit of mix left over to make yourself a spare brownie for greed purposes. I put mine in a little silicone tray- no need to go to the trouble of lining a tiny tin
-To the oven! Bung it in for around 20 minutes on gas mark 5, or until the brownies are still a bit gooey
-When the tarts are removed and cooled on a wire tray, top with a drizzle of caramel (we put ours in a squeezy bottle, but a spoon will do the job too)

Eat 2… and take one to work the next day


Sweet and salty cookies

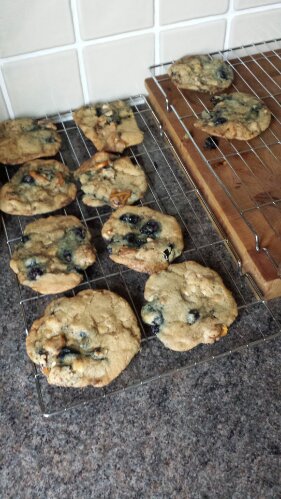
An absolute age ago, I made some rather awesome cookies for a road trip/family gathering. For some reason, I took photos and made the blog post title, but never actually put the pictures in and pressed send, still cookies are good at any time of year, so here’s what they were…

The salty sweety combination is a current favourite of mine- I can’t get enough of the mixed sweet/salt popcorn you can get in Sainsburys, and salt caramel is just mmmmmmm, so when I saw a recipe in Good Food magazine (geek, but I love Good Food magazine!) for pretzel cookies, I had to try them out. To be specific, they’re pretzel, blueberry and white chocolate cookies. Here’s my take on the recipe:

The ingredients (makes about 24)

-175g butter, softened
-200g light soft brown sugar
-100g caster sugar
-1 large egg
-250g plain flour
-1/2 tsp bicarb of soda
-100g blueberries
-50g salted pretzels (the little snacky ones) broken into chunks
-100g white chocolate chunks (I like the Dr Oetker ones as it dispenses with any faff of chopping up chocolate. I’m all about a lack of faff)

What to do
-Preheat the oven to 190c/170 fan/gas 5 and line 2 baking trays with parchment.-Beat the butter and sugars together until pale and fluffy. An electrick whisk is handy or theres a lot of elbow grease
-Add the egg and beat again to combine
-Tip the flour and bicarb in and mix with a spatula
-Add the blueberries, pretzels and chocolate and mix again

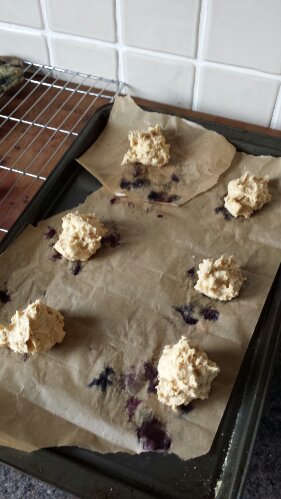
-Spoon dollops of cookie dough onto the trays, leaving plenty of space between- they spread! Bake in batches for 18 minutes
-Half way through the cooking time, take the trays out of the oven, put a teatowel on the worktop and bang the trays on it- This flattens everything out and makes the cookies chewy and brilliant. Then swap the trays over in the oven and continue to bake for the rest of the cooking time-When they’re done, remove from the oven and leave to cool for 10 minutes before transferring to a wire rack and baking some more
imageimage

Windfall muffins

I’ve charted over the last six odd months my somewhat rubbish success with growing veg (the tomato plant had thus far yielded a total of three very delicious cherry tomatoes, and then fell over today in the rain. Not holding out much hope for anything else!). Thankfully, infinitely more successful is the little fruit trees in the garden that must’ve been planted years ago and that I can hold no responsibility for the bountiful supply of fruit that they’ve given, having done nothing more than some over-enthusiastic pruning a few weeks back.

Since the end of August we’ve had apples and pears coming out of the wazoos, and while I don’t mind the occasional apple, I’m not the most massive fan of just eating pears as is. My sister pointed out that pear, blue cheese and walnut salad is lovely though, and I had a real slap forehead moment, as that is definitely in my top 10 favorite salads- how on earth could I have forgotten?!

So I bought some rocket and some stilton and prepared myself for the most awesome week of lunches ever. Forgot to buy walnuts though, and the whole thing feel apart. I ate pitta bread and ham all week and the pears, resplendent on a very cool glass cake stand and now joined by the Stilton in the fridge, continued to glare at me accusingly.

In the back of my head I knew there was a baking recipe I could use that involved pears and a quick flick through nigella express found me just what I had been thinking of- pear and ginger muffins. My muffins look infinitely more rubbish than nige’s bit they taste damn good and have less sugar and less effort. Win freaking win- Here is a recipe…

Ingredients
250g self raising flour
2 tsp baking powder
1 tsp ground ginger
150g caster sugar
75g soft brown sugar
Small pot sour cream (mine was 150ml, minus a couple of spoon fulls that went on a burrito earlier in the week)
125ml vegetable oil
1 tablespoon honey
2 eggs
3 small pears

1- Pre heat the oven to 200°c/gas 6
2- put all the dry stuff in a bowl (everything on the list down to brown sugar)
3- mix everything else except the pears in a jug
4- mix the dry and the wet stuff together
5- chop the pears up. I didn’t bother faffing around peeling mine, and there were no pips which was nice, but if yours have pips and cores, you might want to chop them out so you dont get hard bits in your muffins. I chopped mine between half a cm and 1 cm dice-don’t worry too much about being precise- the fruity chunks are gooood
6- mix the pears in and plop into muffin cases in a tin
7- Bake for 20-25 minutes

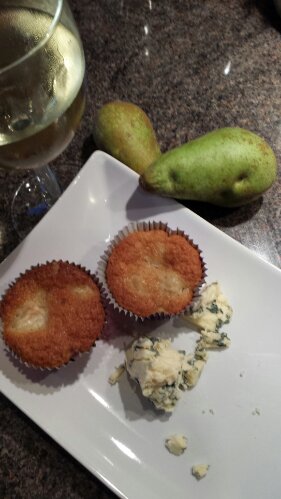
eat warm, or in a little while with the aforementioned accusatory stilton and a nice glass of wine

image

I’ve had at least 6 so far. The recipe is that labour-free that I made them this morning as soon as i got up and had two for breakfast, straight from the oven. Then two more through the day as snacks. And another two as a more official meal, on a plate, with a lump of cheese. Piggy!

The Great Gemmish Bakeoff

My initial tumble into the world of baking coincided with the opening series of the Great British Bake Off (give or take 6 months or so) and I’ve loved it ever since- It’s so cute- British-ly humerous-  the presenters (the lovely Mel and Sue) are encouraging in a slightly piss-takey way, there’s always a bit of an excuse for double entendre (soggy bottoms anyone) or some general smuttiness (a squirrel with massive balls ended up in a cut-away shot in the last series) and there’s always some kind of comedy minor drama be it someone dropping their cake or mistaking sugar for salt, but at the end of the day, nobody gets shouted at or told their rubbish and the judges always find something positive to say about whats on display.

I always come away from watching it thinking ‘ooh, I really want to try x, y, z technique’, but until now, abject laziness got in the way, and I never quite got round to it. The most recent series started last week however, and after watching the contestants tackle challenge number 1- layer cakes, I decided to bite the bullet and start my own Gem version of the bake off challenges.

I’d had an idea in my head for ages to make a rich chocolate cake with a rose buttercream filling, but hadn’t gotten around to it, but I realised I’d faffed enough and took to the recipe books to find what I thought would be the perfect chocolate cake recipe, before deciding that this one would be pretty good- It says ‘ultimate’ in the title- what’s not to like?! http://www.bbcgoodfood.com/recipes/3092/ultimate-chocolate-cake
imageUnfortunately, I didn’t quite have all the ingredients, so had to improvise and ended up putting in a little less chocolate, a little more cocoa powder (plus some baking powder to compensate), three, count em, three types of sugar (dark muscavado, soft brown and bog standard caster) in the quantities I had, oh and I didn’t bother with buttermilk- who has that knocking about, honestly?!

I baked the whole lot in three eight inch sandwich tins, which fitted perfectly, rose nicely, but, disaster of disasters, didn’t actually come out of the tin in one piece. I think the additional sugar stuffed the proportions because everything sort of turned into a big brownie- Proof if proof were needed that when it comes to baking you DON’T MESS WITH THE RECIPE!

Unperturbed, I made up some buttercream, coloured it rose pink and added a teaspoon of rosewater and salvaged some of the cake to make one almost perfect slice for a picture. The rest of it I took to the pub in unceremonious lumps, with a pot of the buttercream and some plastic knives and let everyone get stuck in, in a less elegant way.

There wasn’t a bad word said about it, although I think if Mary Berry had been judging I would have been marked down considerably for baking a brownie rather than a sponge. Good job I wasn’t on the telly in that case!

Infinity and beyond! In cake form

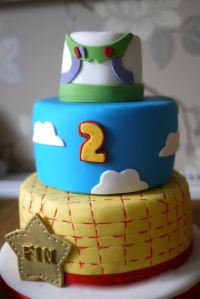
toy story cakeI haven’t made a big cake in quite a while. Last year was so mad for cake, that it sort of got in the way of life in general, so for 2013, Mark and I made a conscious decision to take on fewer orders and get a bit of spare time for ourselves. i just couldn’t, however, turn down the opportunity to make my nephew Fin a birthday cake. The theme, the works of Toy Story, Fin’s favourite- the three films are played on a loop wherever he goes, and he has a hefty amount of merchandise that he plays with endlessly. The favourite, Mr Potatoooo Head, who didn’t feature in the cake actually, but maybe next year, eh! I hit on the idea of making three tiers, with each themed around something different. Granted, a three tier cake for a two year old might seem a tiny bit ostentatious, but once I got the idea in my head, I just had to go for it.

Friday, we bought all the ingredients, and mixed up the vanilla top and bottom tiers while a pizza was cooking for dinner. Pizza eaten, I got the middle, chocolate tier sorted, and hung out watching Friday night tv.
On Saturday a bit of an early start, I went to our local cake supply shop and got the sugarpaste, while Mark levelled, filled and crumb coated the cakes, then I dealt with covering the cakes,while Mark made the decorations. A bit of assembly later, and some colouring in with a decorators icing pen, we were done. It was so nice to be caking again,after a break of about 4 months, and it all came together so well, that I think we both realised that we’d really kind of missed it, so who knows, maybe I’ll accept a few commissions soon, rather than turning everything down!

Anzac biscuits

For reasons that I won’t go into (ok, it was basically a miscalculation of amounts for a wedding order towards the end of last year), I ended up with a LOT of butter hanging about creeping ever closer to its sell by date. Baking seemed like the obvious use, so I took to the internet to find something that used some of the butter, but didn’t involve me leaving the house for ingredients- well, it was cold!

Anzac biscuits seemed like they’d do the trick- I didn’t have eggs, which knocked a lot of baking recipes on the head, but thankfully, Anzac biscuits, being something of a wartime staple in Australasia (Anzac stands for Australia and New Zealand Army Corps, see!), didn’t need them- For obvious reasons of egg-based scarcity in the first world war.

So, to the recipe:
Preheat the oven to gas mark 4/180C
Get your bowl and throw in:
85g porridge oats
85g dessicated coconut
100g plain flour
100g caster sugar

Melt 100g butter, then stir in 1 tablespoon of golden syrup
Boil the kettle- Mix 3/4 teaspoon bicarb of soda with 2 tablespoons of boiling water
Pour the watery bicarb into the buttery golden syrup

Make a well in the middle of the dry ingredients, pour in the wet ingredients, mix with a wooden spoon until everything is combined

Go in with your hands and squidge together walnut sized balls of the mix. Drop onto greased baking trays- Leave an inch between each blob because the do spread!

Bake for 10-12 minutes- They should be golden, but will still be a bit wet in the middle- Don’t worry, they harden as they cool!- Take them off the tray and put on a cooling rack

This made a batch of 18. They’re all gone now